Tuesday, June 4, 2013

$3.50 Napkin Pillow Tutorial

Time for a DIY project.....a napkin pillow! Most of you know I love pinterest. I mean you can seriously find anything on there. Today I was just bored because I'm not in school, I haven't started my job yet and my husband was working. So...I decided to make a pinterest project. We had some old pillows that I was just going to throw away but then I thought there has to be something I can do with these! So my search on pinterest started. I found a post for pillows made out of cloth napkins..here is the post I found no sew napkin pillows . So with that I started my mission. I went to TJ Maxx and found a set of 4 Ralph Lauren cloth napkins for $5. I bought one pack on the napkins and then stopped by Wal-Mart to get the no sew sticky hem (yes I HATE wal-mart but there really isn't anywhere else to go in the town where I live and it was right next to TJ Maxx). When I got home I started putting the pillow together. I didn't take long and I think it looks good (remember that I am not a seamstress so what may look good to me might not look good to people who know what they are doing)
The Tutorial----it's actually pretty simple but I'll give a tutorial anyways
The Supplies for 1 pillow
2 cloth napkins
Iron
Peel and Stick Hem
an old pillow (not pictured)
Step 1
Iron your napkins. I did not do this step at first and had to go back and do it. It's a lot easier to go it at the beginning. I ironed it when I had already attached one side, it's lot harder that way. (Please excuse the mess behind the iron we are in the process of moving! and yes I need to clean my iron!)

Step 2
Attach the peel and stick hem to all three sides of one napkin. This is another thing that I would have done different. I would have attached one side at a time. 

Step 3
Peel the backing from the hem and stick the three sides to the other napkin. This part may seem easy but it's not, you have to take your time and make sure that everything is even. 

Step 4
Now that you have the napkins together with the three sides even, it's time to use your old pillow. Cut the top off of the old pillow and pull out the the insides. The inside will look like this.


Step 4
Pull the insides of the old pillow apart and stuff them into the "new pillow". There's really no rhyme or reason to this step, just pull and stuff until the pillow is full and it's not too lumpy. 

Step 5
Put the peel and stick hem on the fourth side to close your pillow. And now you have a new pillow. 
Total Cost $3.50 per pillow! and it's a Ralph Lauren pillow since I used Ralph Lauren napkins!

My pillow! it doesn't look as good because I used my  cell phone, but  they look really good in person. 
Pinterest pillows...apparently a professional photographer took this picture!

Good luck making your own pillow!

Monday, June 3, 2013

Wedding day 8-3-2012

My husband and I were married 10 months ago today. The wedding was perfect and the ONLY thing I would have done different was hired a videographer. With a lot of help from my mom, dad, and in laws we were able to do a lot of personal touches. So here is an overview of the wedding!

The Location
Millstone at Adams Pond in Columbia SC. I would recommend this place to anyone who is getting married close to Columbia. It's like a hidden gem in the city of Columbia. Not only is it beautiful and it was reasonably priced compared to other places in Columbia..the best part about it was the wedding planner that came with the venue, Kristy Polk. I could not say enough good things about her, she just took all the stress out of the whole process! So here are a few pictures of the venue and yes we did have an outdoor wedding in August in Columbia South Carolina, but it was still AMAZING!


The vendors
The DJ was the only request that my husband had for the whole wedding. His name is Sam Bigby. Here is the link to his website http://www.djsambigby.com/. He was great and kept the party going all night. Even people who wouldn't normally dance (like grandmas) were dancing! And his is also reasonably priced. Here is a picture to just show how much fun everyone had with him as the DJ.


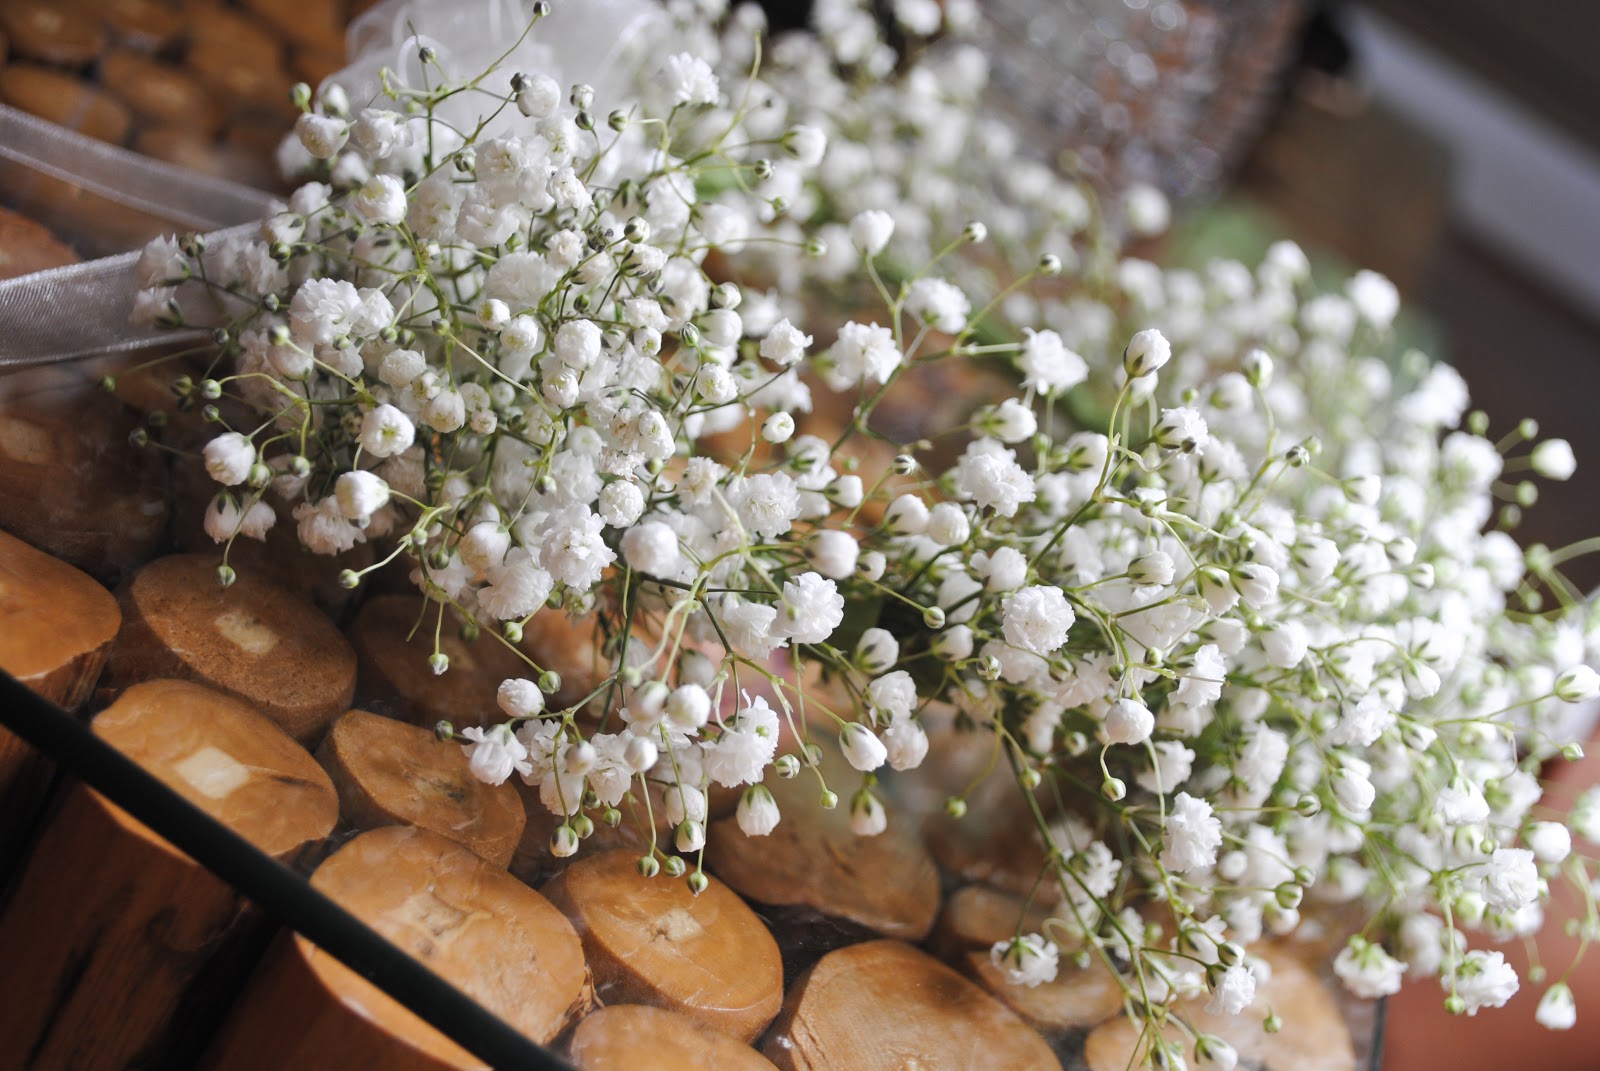
Our florist was also amazing. We priced a lot of florist because everyone was so expensive! The best price we found in columbia was lexington florist, here is their link http://www.lexingtonfloristsc.com/ . I knew what I wanted when it came to flowers and they were pretty simple. That's why I couldn't understand why everyone was charging so much money! We looked into ordering the flowers at Sams and doing them ourselves but my dad talked us out of that. And I am so glad he did! I would not recommend anyone do that, it would have been so stressful. Lexington Florist did a great job and they even brought some extra flowers with them in case we wanted them.My husband and I made wooden boxes to put the flowers in for the centerpieces. My mother in law and grandmother in law made the boutonnieres. My husbands family grows cotton so we made boutonnieres out of cotton bolls. Here are some pictures of the flowers.

 
The photographer. Linsey Wilson Photography is who we used. I went to college with Linsey, she was my little sis in the sorority that we were in. She is amazing and the pictures turned out great. I would also recommend her! Here is the link to her facebook page https://www.facebook.com/#!/pages/Linsey-Wilson-Photography/219826524708132?fref=ts
 
 
For the cake we used Parkland Cakes in Columbia. Their work is great and they were really easy to work with. Here is the link to their page http://www.parklandcakes.com/Pages/default.aspx and the link to their facebook page. https://www.facebook.com/#!/pages/Parkland-Cakes/266310407242?fref=ts  And here is a picture of our cake.
 
The wedding dress. I bought it an Evelyn's bridal in lugoff SC. They were great and made you feel like you were their only costumer. They have a great selection of dresses. We also used them for our bridesmaids dresses. Here is their link http://www.evelynsbridalonline.com/ . For the groomsman we wanted seersucker suits. We found that it was actually cheaper for the guys to buy their suits from Jos. A. Banks when they had a sale than it was for everyone to rent them. Here are pictures of the guys suits, girls dresses and my dress.


Now for all of the special touches. I am going to just post pictures for this part and put a few captions because I am tried of typing!
Basket for the bridesmaids while getting ready. This is a must for weddings because you never know what you might need or if someone will forget something!


Our wedding favors. We used shelled pecans from the farm and put them in burlap bags. I made business cards at vistaprint and we attached these to the bags as labels. I also used my cricut and cut out the R that we glued on the front of the bags.

Who knew you could print on burlap. Thank you pinterest!


Bridesmaids gifts. Monogrammed bath robes and personalized hangers that I made with the cricut.

One of my favorite things from the wedding. Our flower girl rode a tricycle down the aisle with a sign made by my dad on the back.

Chicken and waffles!


Groomsman's gifts. Personalized beer mugs made on the cricut with bow ties for the wedding!
The relief station. It was HOT for our outdoor wedding. This was made by my husbands step-mom. Bug spray, cold water, and frozen washcloths in ziplock bags.


I made these tears of joy packets from stickers that I made at vistaprint. We used vistaprint a lot for our wedding. We used groupons for vistaprint and ended up getting really good deals.
The programs/fans. My dad put A LOT of work into making these and they turned out great! Aren't Dads amazing?! This was one of the many projects that he did.

The wedding guest book. This is not the best picture but we put a photo book together using pur engagement pictures and everyone signed it! We still have it on our coffee table!
Clothes line with our engagement pictures strung across the mantel and pictures of our family member's weddings.

So there it is. An overview of our wedding day. Thank you to everyone who made our day so special. Especially our family and friends who put so much time into helping us. We love each of you! 


My first blog post!!!

Who Am I?
This is my first introduction to  the blogging world! I've been wanting to start a blog for a long time but due to nursing school consuming all of my time, I just couldn't do it. I guess I will start by telling you a little bit about myself. I am 28 years old and little in a small farming town in South Carolina. I married the love of my life last August. I just finished nursing school at a local college, have passed the NCLEX (nursing boards) and I am now officially Megan Rast, RN. My husband and I live on his families farm, which has been a big adjustment for this city girl! We are in the process of buying a house in the town where we live now (the towns not very big so it's only 3 miles from where we live now). I will be starting to work on the pediatric floor at a local hospital in two weeks! I am so excited about starting my first job as a registered nurse!

What do I hope to accomplish with this blog?
I LOVE. LOVE, LOVE diy projects!!! I could seriously spend days on pinterest finding projects to do.I don't understand why people pay $500 for a piece of furniture, when you can redo an old piece for $50. Although I love doing these projects, many of them do not work out. Through this blog I would like to show the projects I have done to either encourage other people to do them or show people the ways to not do them. As I stated earlier we are in the process of buying a house so I have a lot of diy projects planned.

Hope everyone will enjoy reading this blog. I will be doing a wedding post later today to show some of the diy projects from our wedding day!